
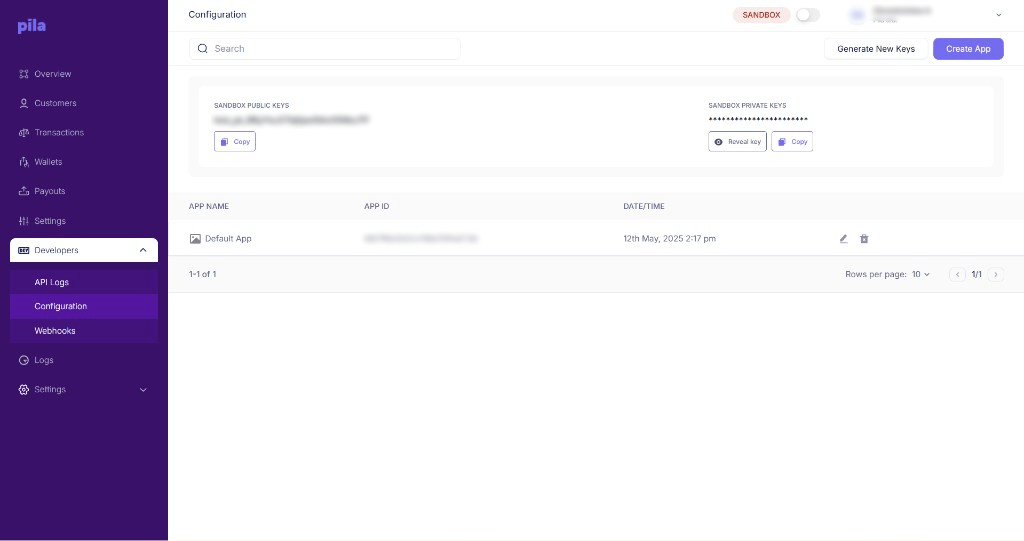
Configuration — API keys at the top, your apps listed below
Creating one
1
Open Developers → Configuration
From the sidebar, expand Developers and choose Configuration, or go straight to dashboard.trypila.co/developers/configuration.
2
Select Create App
The button sits at the top right of the Configuration page.
3
Name it and save
The new app appears in the Apps table below. Every business starts with a Default App.
4
Copy the App ID
It is the alphanumeric string in the APP ID column. This is what you send in the
AppId header.Your API keys
The API Keys panel on the same page holds the pair for whichever mode the top-bar switch is set to. Sandbox public keys start withtest_pk_.
Use Reveal key to see the private key, Copy to take it, and Generate New Keys to rotate the pair.
Full detail on keys and app management: Configuration.
Getting verified
You can build in sandbox immediately, but your company must be verified before live keys will work. There are two steps, both completed by your company’s authorised signatory: identity/business verification, then signing the SLA. See Company verification for the walkthrough.Next
Authenticate a request
Put your
AppId and key to work.Quickstart
Create a wallet and send a transfer.